You don’t need new gear to start. Stream with the phone you already have, and move to the next step only when something starts to bother you.
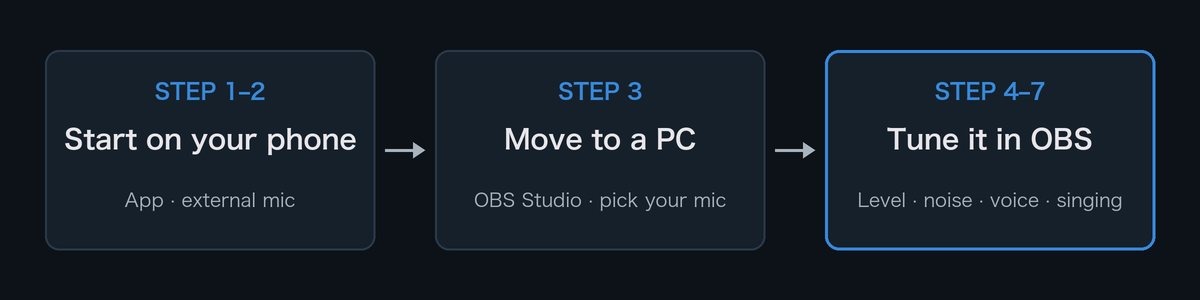
Start on your phone
What to do
- If your streaming app has a built-in music feature, use it for background music.
- Before going live, record your stream or open it on a second device, and listen to your voice and the music.
How to tell it worked… Your voice is clear, and the music sits below it.
Common mistakes
- Playing music from another app can cause your voice to drop out of the stream.
- Your voice distorts. Once the sound clips, turning it down later won’t fix it. If a mixer or wireless receiver sits between your mic and your phone, turn that down instead.
Add an external mic
If viewers say you sound muffled or echoey, getting a mic closer to your mouth helps more than any app setting.
What to do
- Pick a mic that fits your phone’s port. The iPhone 15 and newer, along with most Android phones, use USB-C; older iPhones use Lightning.
- Plug it in, hold it close to your mouth, and compare recordings.
How to tell it worked… Less room echo than the built-in mic, and your voice sounds closer.
Common mistake… Pairing a wireless mic over Bluetooth alone leaves your stream with no sound. Plug the receiver into the phone instead.
Move to a PC
When you want to show game footage, balance music, game audio and voice separately, or put filters on your voice, it is time to stream from a PC. For PC game streams, choose Windows. For singing or chat streams, a Mac works fine.
What to do
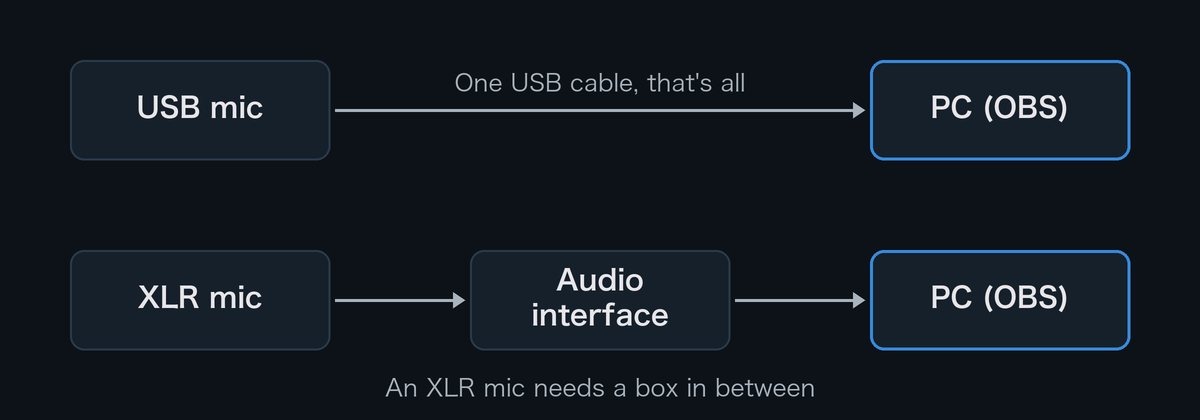
- Connect your mic. For voice only, a USB mic plugs straight in. A mic with an XLR cable needs an audio interface in between.
- Install OBS Studio (free) from the official site.
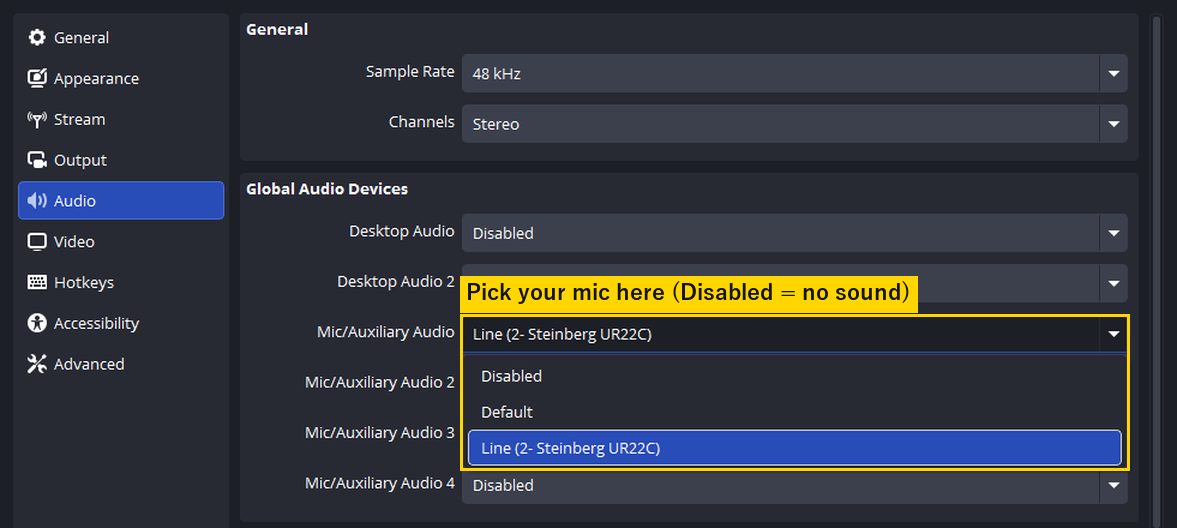
- In OBS, open Settings → Audio → Mic/Auxiliary Audio, choose your mic, and click Apply.
How to tell it worked… The Audio Mixer at the bottom of OBS shows your mic, and its meter moves when you talk.
Common mistakes
- Mic/Auxiliary Audio is still set to Disabled, so the meter never moves.
- On a Mac, no mics show up in the list. Enable microphone access for OBS under System Settings → Privacy & Security → Microphone, then restart OBS. On Windows, allow apps to use the mic under Settings → Privacy & security → Microphone.
Set your mic level
What to do
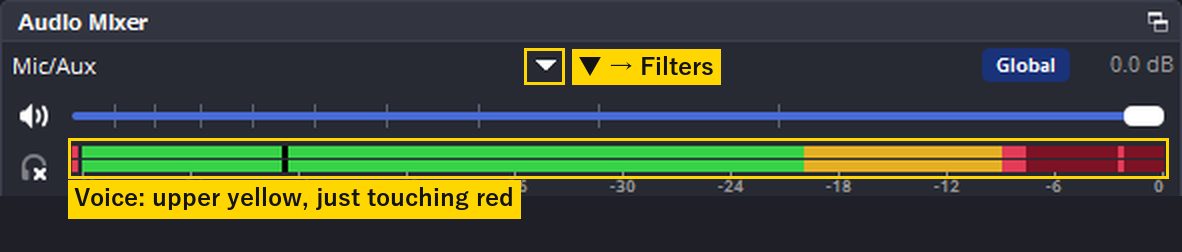
- Talk at your normal volume for about 10 seconds and watch your mic’s meter in the Audio Mixer.
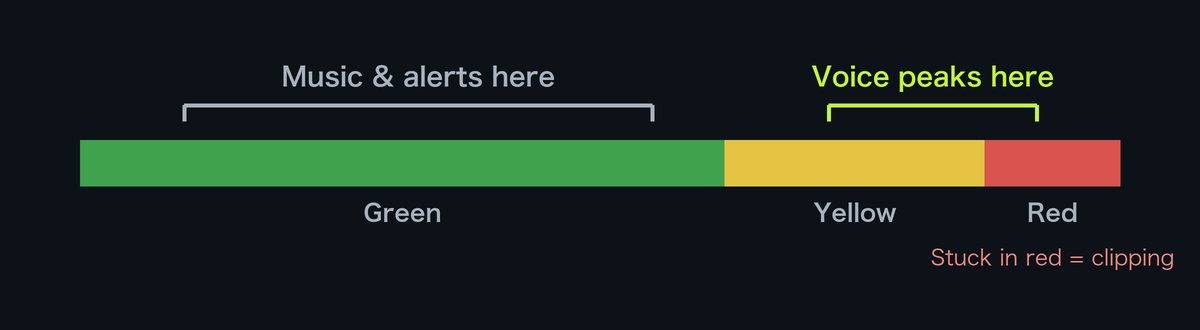
- Aim for the top of the yellow zone, just touching the red. Keep music and alert sounds in the green. That is also what the official OBS guide recommends.
- If you are too quiet, turn up the knob on your USB mic or audio interface first. If that is not enough, add a Gain filter in OBS.
- Click Start Recording, record about 30 seconds, and listen with earbuds.
How to tell it worked… In the recording, quiet words are easy to hear and loud ones don’t distort.
Common mistakes
- Judging your level by how you sound to yourself while talking. Viewers don’t hear that, so always check a recording.
- Adding too much gain with the OBS Gain filter also amplifies background noise like your air conditioner.
- In the recording, your voice comes only from the left. With a mic in input 1 of an audio interface, OBS may put it on the left channel only, and only one of the two meter bars moves. Open the Audio Mixer gear → Advanced Audio Properties and tick Mono for your mic.
- Laughing or shouting pins the meter in the red and clips. If your streams tend to get loud, add a Limiter as the last filter (see Step 5 for how to add filters).
Remove background noise
What to do
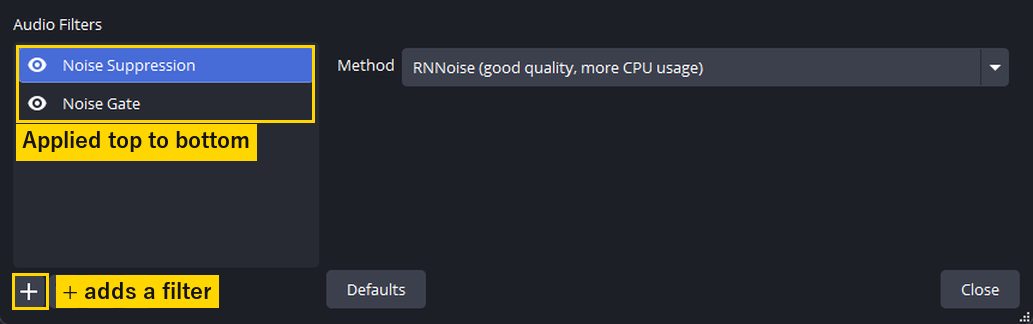
- In the Audio Mixer, click ▼ next to your mic’s name and open Filters (some versions show a gear or ⋮ instead).
- Click + at the bottom left and add Noise Suppression. It often removes air conditioner and PC fan noise.
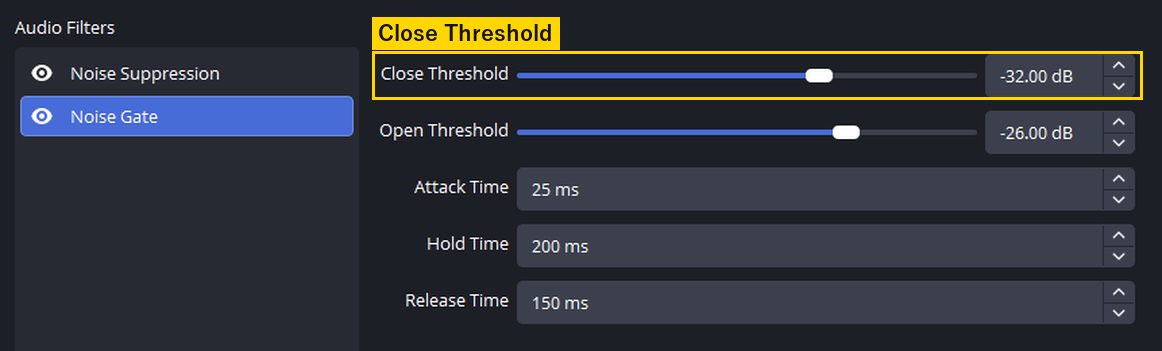
- If you still hear noise between sentences, add a Noise Gate too. It mutes the mic automatically while you are not talking.
- Record and listen to the gaps between sentences.
How to tell it worked… No air conditioner or fan noise between sentences, and the ends of your words are not cut off.
Common mistakes
- A noise gate set too aggressively cuts off quiet words and word endings. Lower the gate’s Close Threshold.
- Keyboard clicks while you talk won’t go away. A noise gate can’t remove sound that overlaps your voice; that needs AI noise removal → How to Remove Keyboard Noise in OBS
Make your voice easier to hear
What to do
- If viewers say your voice gets lost under the game, turn the game down in the Audio Mixer first.
- If your voice still sounds buried or muffled, add a vocal plugin to your mic’s filters.
How to tell it worked… Even on a phone speaker, every word of the recording is clear.
Common mistake… You installed a plugin, but it doesn’t show up in the filter list. Most plugins today are VST3, and the VST 2.x Plug-in filter built into OBS only supports VST2 → How to Use VST3 Plugins in OBS Studio
Singing streams
OBS has no echo or reverb filter of its own.
What to do
- Add an echo or reverb plugin near the end of your mic’s filters, before the Limiter.
- Record one song with your backing track and listen to both.
How to tell it worked… With the effect on, the lyrics are still clear, and your voice stays in time with the track.
Common mistake… A plugin with latency puts your voice behind the track. Delay the track to match using Sync Offset (Audio Mixer gear → Advanced Audio Properties).

More → OBS Singing Filters / How to Add Reverb to Your Voice in OBS
Filter order
OBS applies filters from the top of the list down. When in doubt, use this order. Skip anything you don’t use.
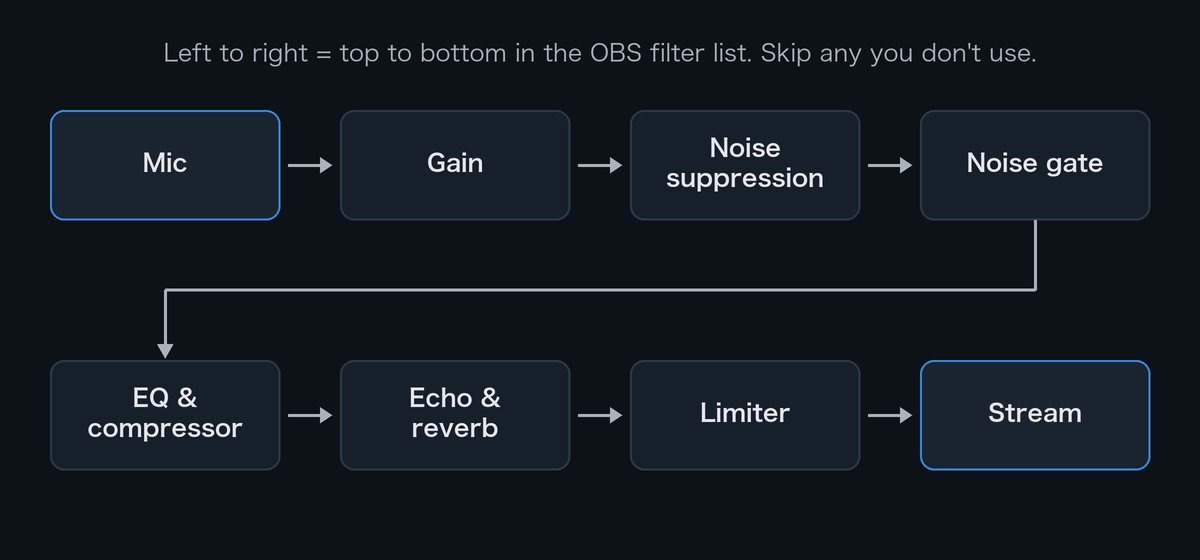
Remove noise before shaping your voice, because a compressor lifts quiet sounds; any noise left in gets louder. Put the limiter last so that any volume spikes along the chain are caught before reaching the output. Setups for chat and singing streams → OBS Mic Filter Order
Free plugins from this site
Streaming plugins for when the built-in filters are not enough.
 VELVOXVELVOX is a free voice plugin for game and talk streamers. Two knobs add body and clarity to your voice so it is not buried under music or g…See details
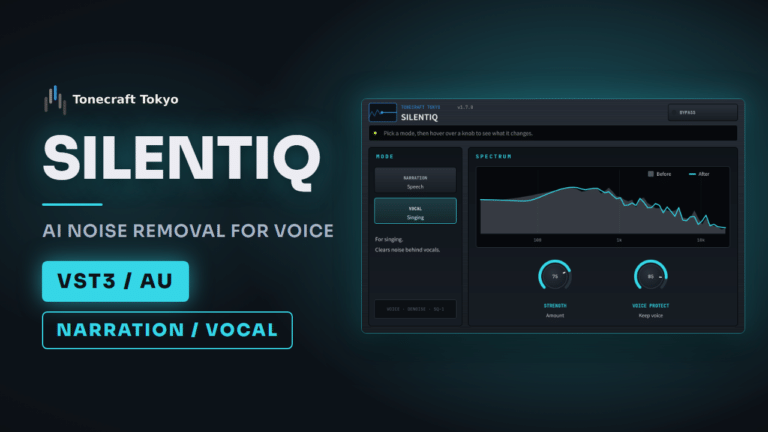 SILENTIQ TrialSILENTIQ is an AI noise-reduction plugin. It removes air conditioners, fans and keyboard clicks in real time and keeps the voice natural. NA…See details
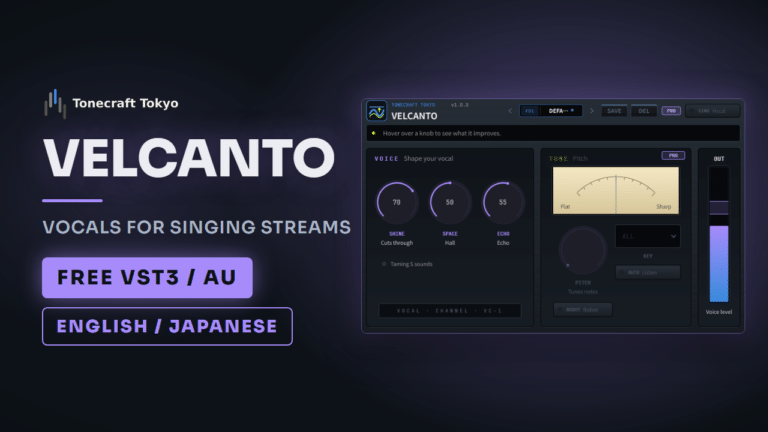 VELCANTOVELCANTO is a free vocal plugin for streamers who sing. Three knobs with no audio jargon bring your voice forward and add a hall and a karao…See details
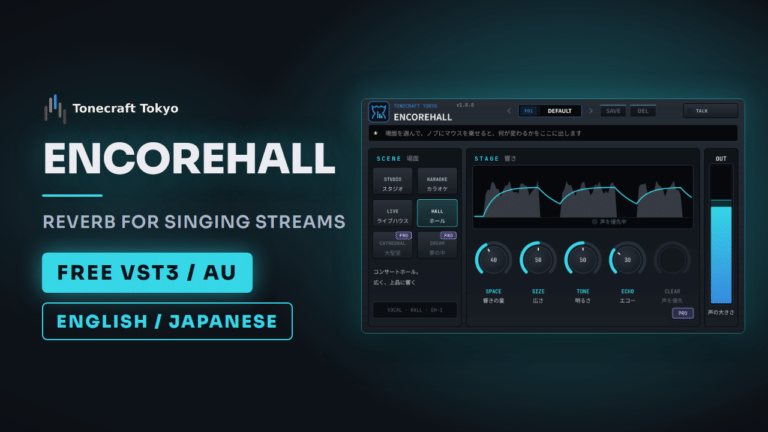 ENCOREHALLENCOREHALL is a free reverb and echo plugin for streamers who sing. It makes your voice sound like you are singing in a real venue, with kno…See details